
![upgrade-ram-on-your-pi-4,-the-fun-way-[hackaday]](https://i0.wp.com/upmytech.com/wp-content/uploads/2023/03/112910-upgrade-ram-on-your-pi-4-the-fun-way-hackaday.jpeg?resize=800%2C445&ssl=1)
Upgrade RAM On Your Pi 4, The Fun Way [Hackaday]
The Raspberry Pi shortage has been a meme in hacker circles for what feels like an eternity now, and the Pi 4 seems to be most affected – though, maybe it’s just its popularity. Nevertheless, if you’re looking for a Pi 4, you would need to look far and wide – and things are way worse if you need the 8 GB version specifically. Or so we thought – [MadEDoctor] shows us that refreshing online store pages isn’t the only way, having successfully upgraded the RAM chip on the Pi 4 from 1 GB to 8 GB with help of a hot air gun.
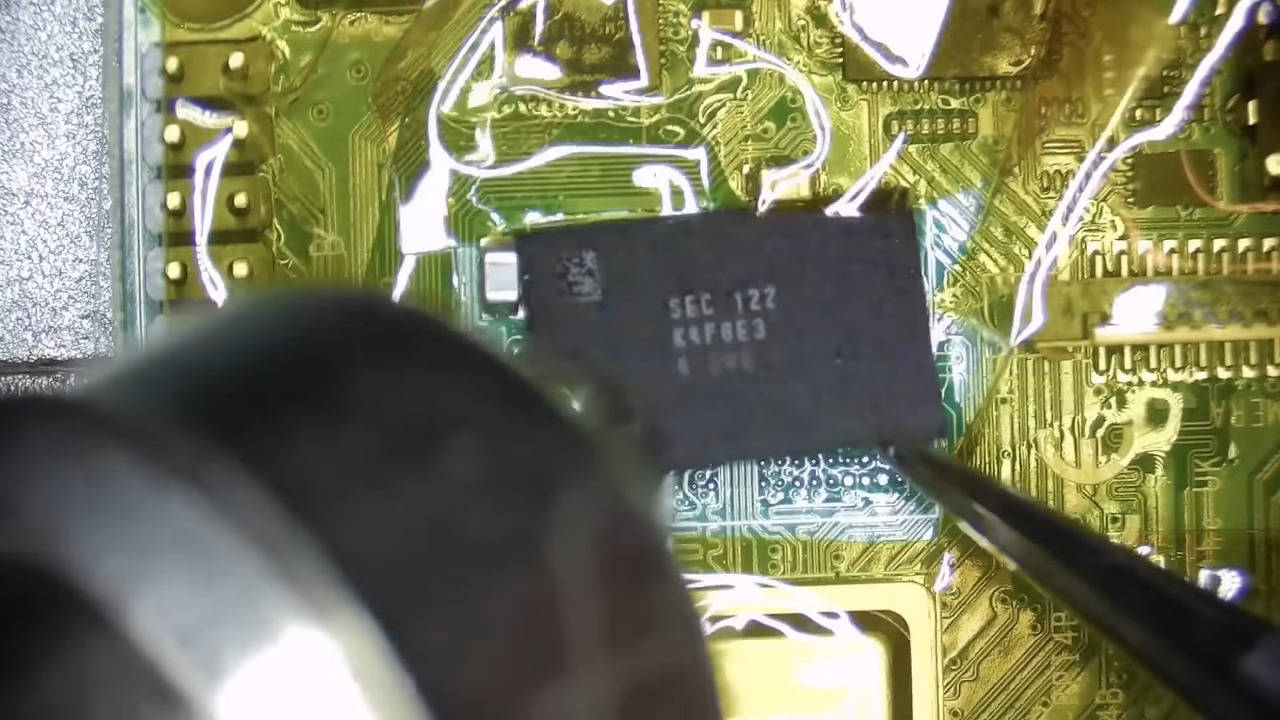
These chips are BGA, and those might feel intimidating if you’re just starting out with hot air – however, we recommend you watch this video, as [MadEDoctor]’s approach is of the kind that brings BGA replacement to hobbyist level. First off, you get a compatible RAM chip somewhere like Aliexpress – lucky for us, those come equipped with a set of balls from the factory. The default balls are made of lead-free solder, and [MadEDoctor] reballed the RAM chip with leaded solder balls to lower the melting point, but it’s by no means a requirement that you do the same.
In fact, you only need a hot air gun, flux, a soldering iron and some solder wick to perform the replacement – no reballing equipment. Put some kapton or metal tape on the board for heat shielding, get the old chip off with hot air, use an iron with wick to clean the pads, add some flux, align the chip, then use hot air to solder a new chip onto the board. Replacing this chip can get your Pi 4 to the highly-sought-after 8 GB target – as an aside, we’re surprised that there was no configuration needed, as the Pi 4 booted right up and successfully recognized the extra RAM added.
We’d personally recommend preheating for such an upgrade – that said, this sure went without a hitch, and such a RAM swap method doesn’t require any stencils, solder paste or solder ball applications. Drop by the video description for compatible RAM chip part numbers, make sure you have your tacky flux and solder wick in order, and let [MadEDoctor] walk you through upgrading your Pi 4 the hacker way. Is this hack to your liking? Take it up a notch with this laptop soldered-in RAM upgrade journey, or that one RAM upgrade for an old GPU to comply to Apple’s whims.