
![keebin’-with-kristina:-the-one-with-the-kicad-plugin-[hackaday]](https://i0.wp.com/upmytech.com/wp-content/uploads/2024/08/202691-keebin-with-kristina-the-one-with-the-kicad-plugin-hackaday-scaled.jpg?resize=800%2C445&ssl=1)
Keebin’ with Kristina: the One with the KiCad Plugin [Hackaday]

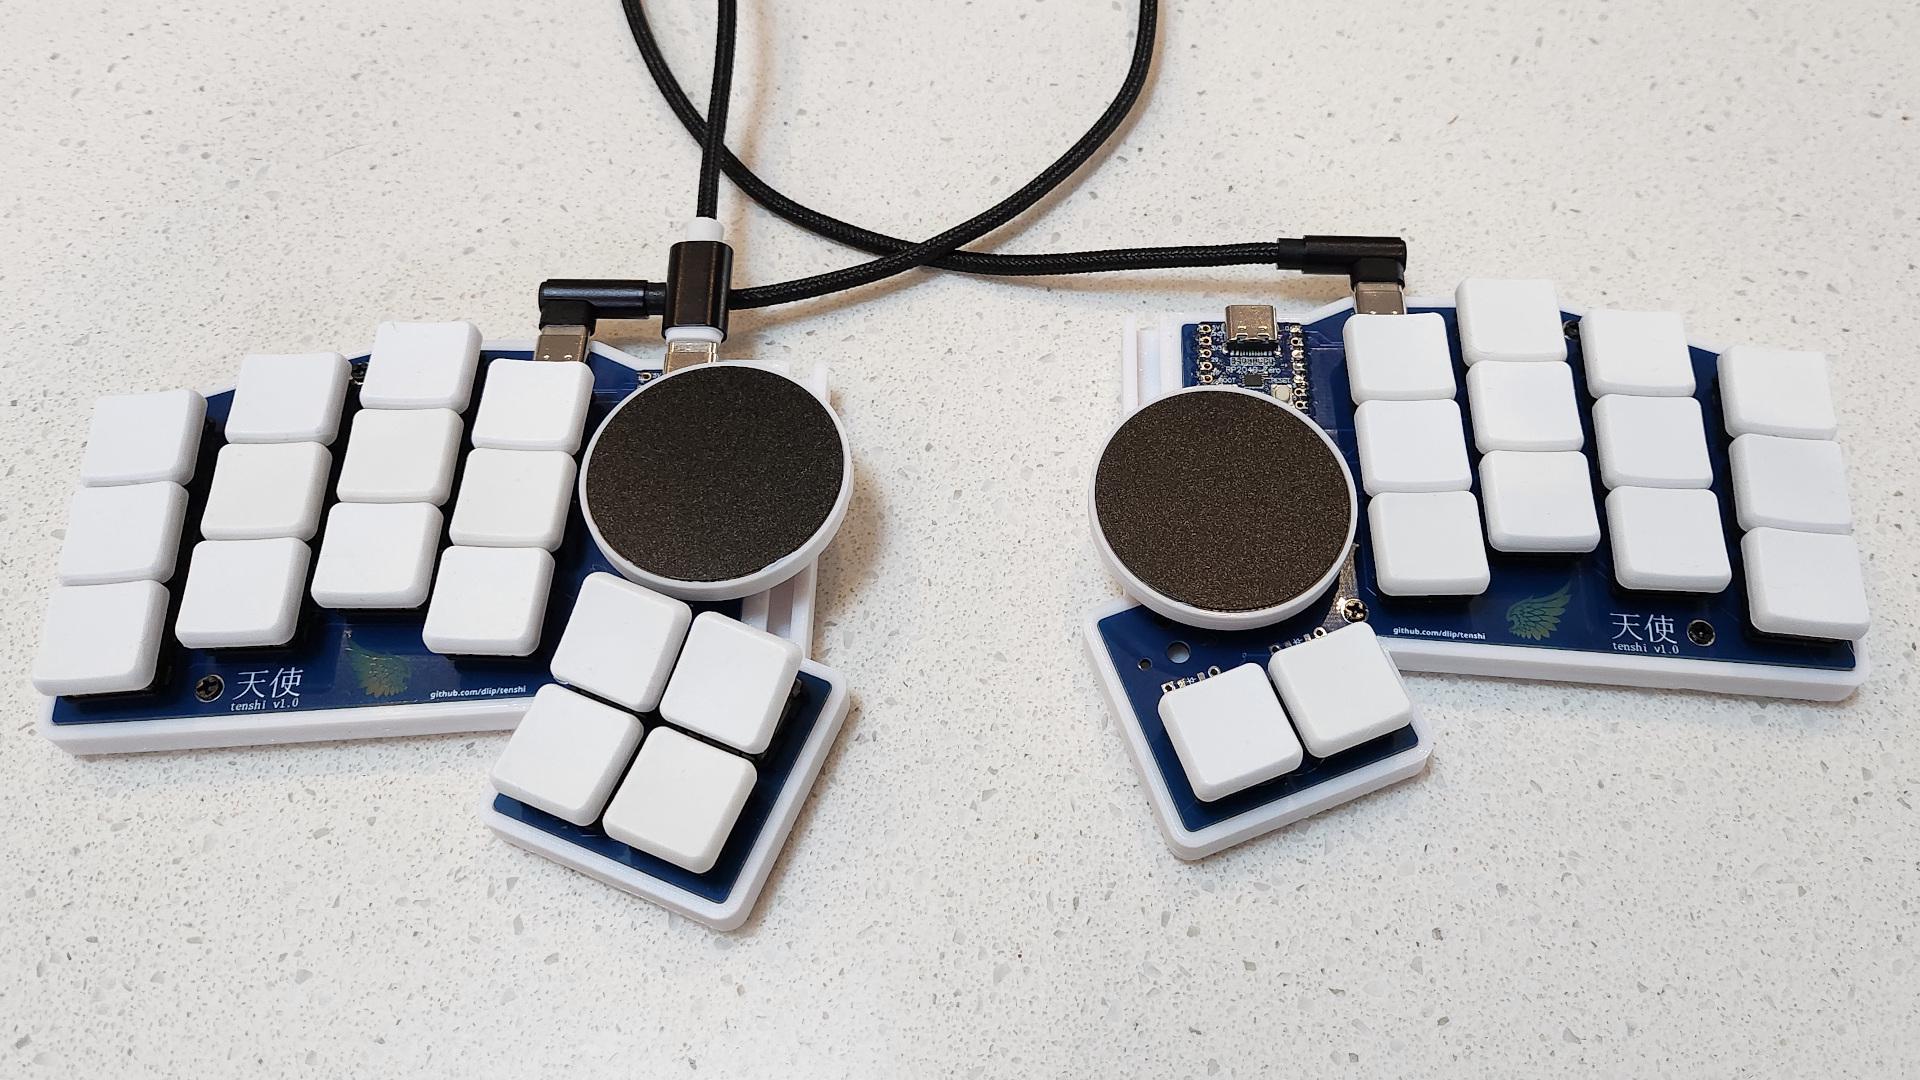
The most striking feature of the Tenshi keyboard has to be those dual track pads. But then you notice that [fata1err0r81] managed to sneak in two extra thumb keys on the left, and that those are tilted for comfort and ease of actuation.
The name Tenshi means ‘angel’ in Japanese, and creator [fata1err0r81] says that the track pads are the halos. Each one slides on a cool 3D-printed track that’s shaped like a half dovetail joint, which you can see it closer in this picture.
Tenshi uses a pair of RP2040 Zeros as controllers and runs QMK firmware. The track pads are 40 mm each and come from Cirque. While the Cirques have been integrated into QMK, the pull request for ZMK has yet to be merged in. And about those angled keys — [fata1err0r81] says they tried risers, but the tilting feels like less effort. Makes total sense to me, but then again I’m used to a whole keyboard full of tilted keys.
kbplacer Is Your New Best Friend
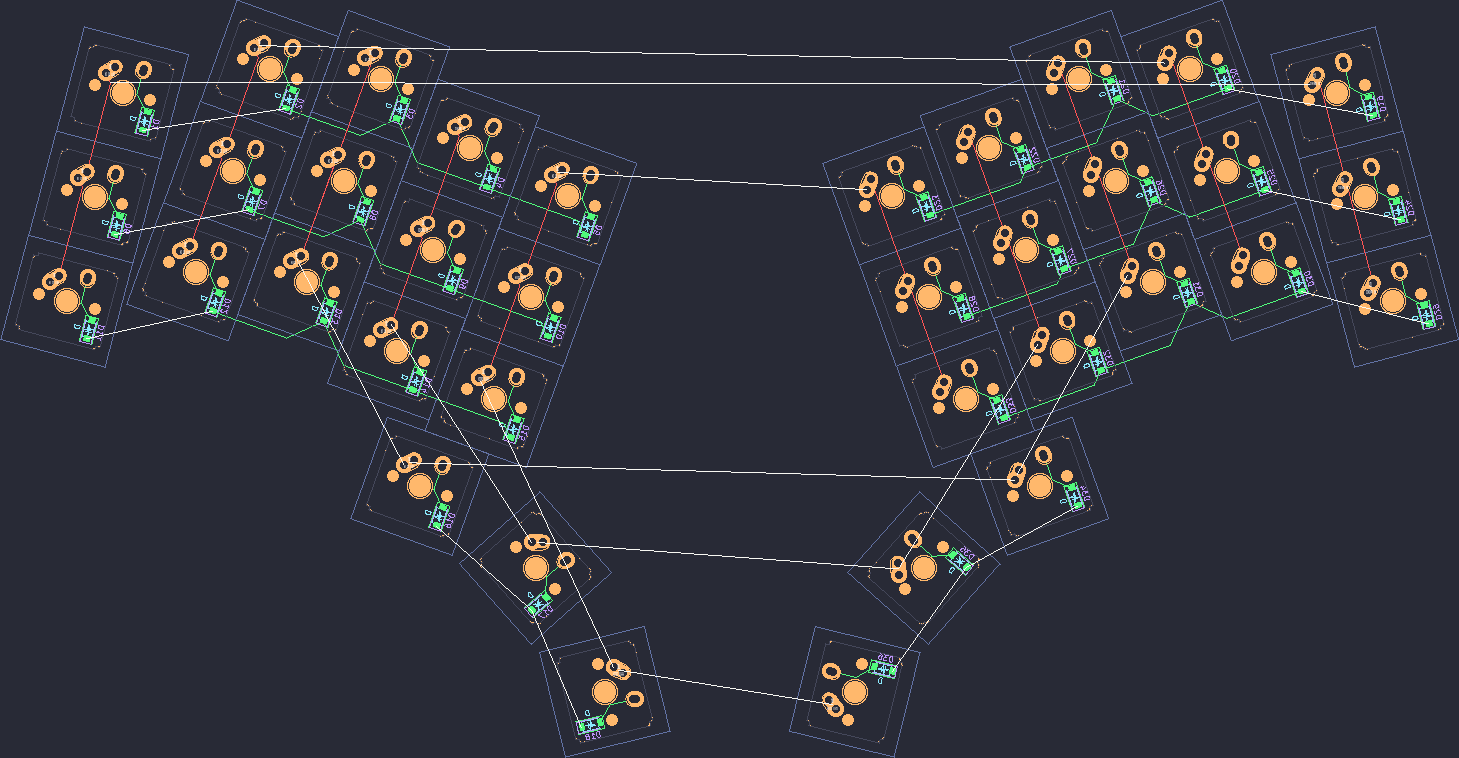
What’s the worst part about building custom mechanical keyboards? Well, it probably depends on the person, but for many, the answer would be placing the elements and routing them in order to create the actual PCB.
[Adam] wrote kbplacer, which is an open-source KiCad plugin for designing mechanical keyboards. kbplacer does automatic key placing and routing, and works with Keyboard Layout Editor, VIA, QMK, and, experimentally, Ergogen. It also places diodes, and lets the user select the diode position in relation to key position. In addition, kbplacer can also be installed with pip as a Python package for use with other tools.
If you do want to use it with Ergogen, [Adam] outlines a workflow example. Also, check out how kbplacer works with a whole bunch of popular layouts.
The Centerfold: Battleship Harleyquin
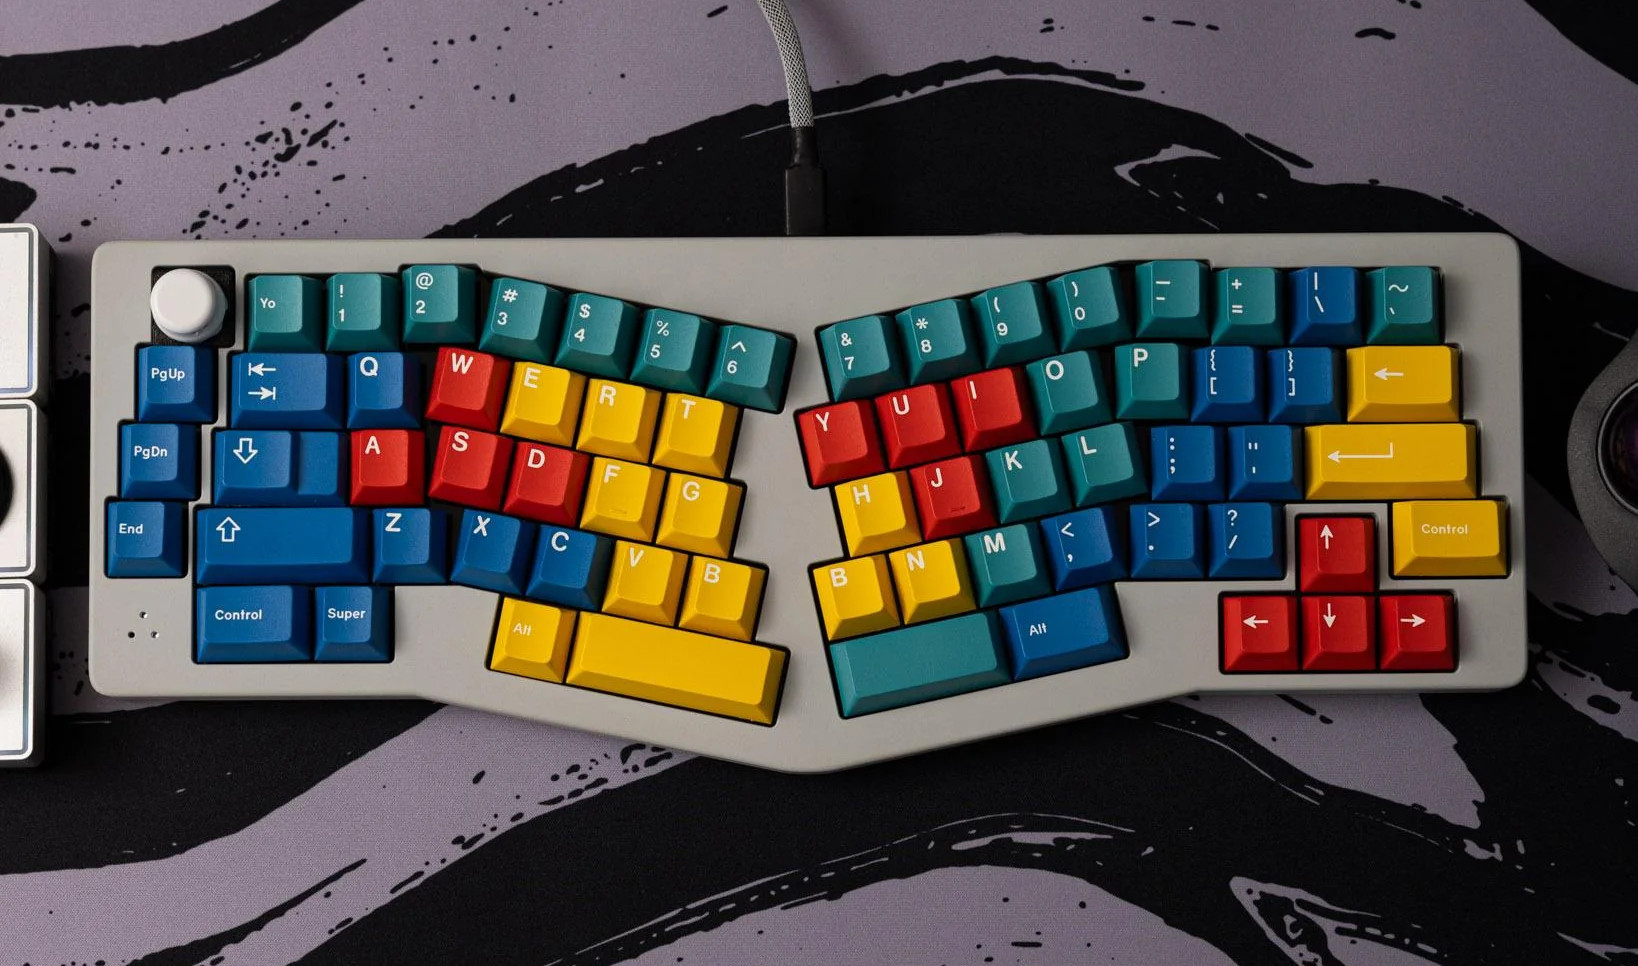
Harlequin all the things, I say, and bring back the four-color Volkswagen. That’s why I love this here Battleship Harleyquin. Don’t miss the gallery!
This may look like an Alice, but it’s really the AVA by Sneak Box with GMK Panels key caps. A matching Panels desk mat might have been too much; I think the GMK Slasher looks nice.
Do you rock a sweet set of peripherals on a screamin’ desk pad? Send me a picture along with your handle and all the gory details, and you could be featured here!
Historical Clackers: the Smith Premier 1
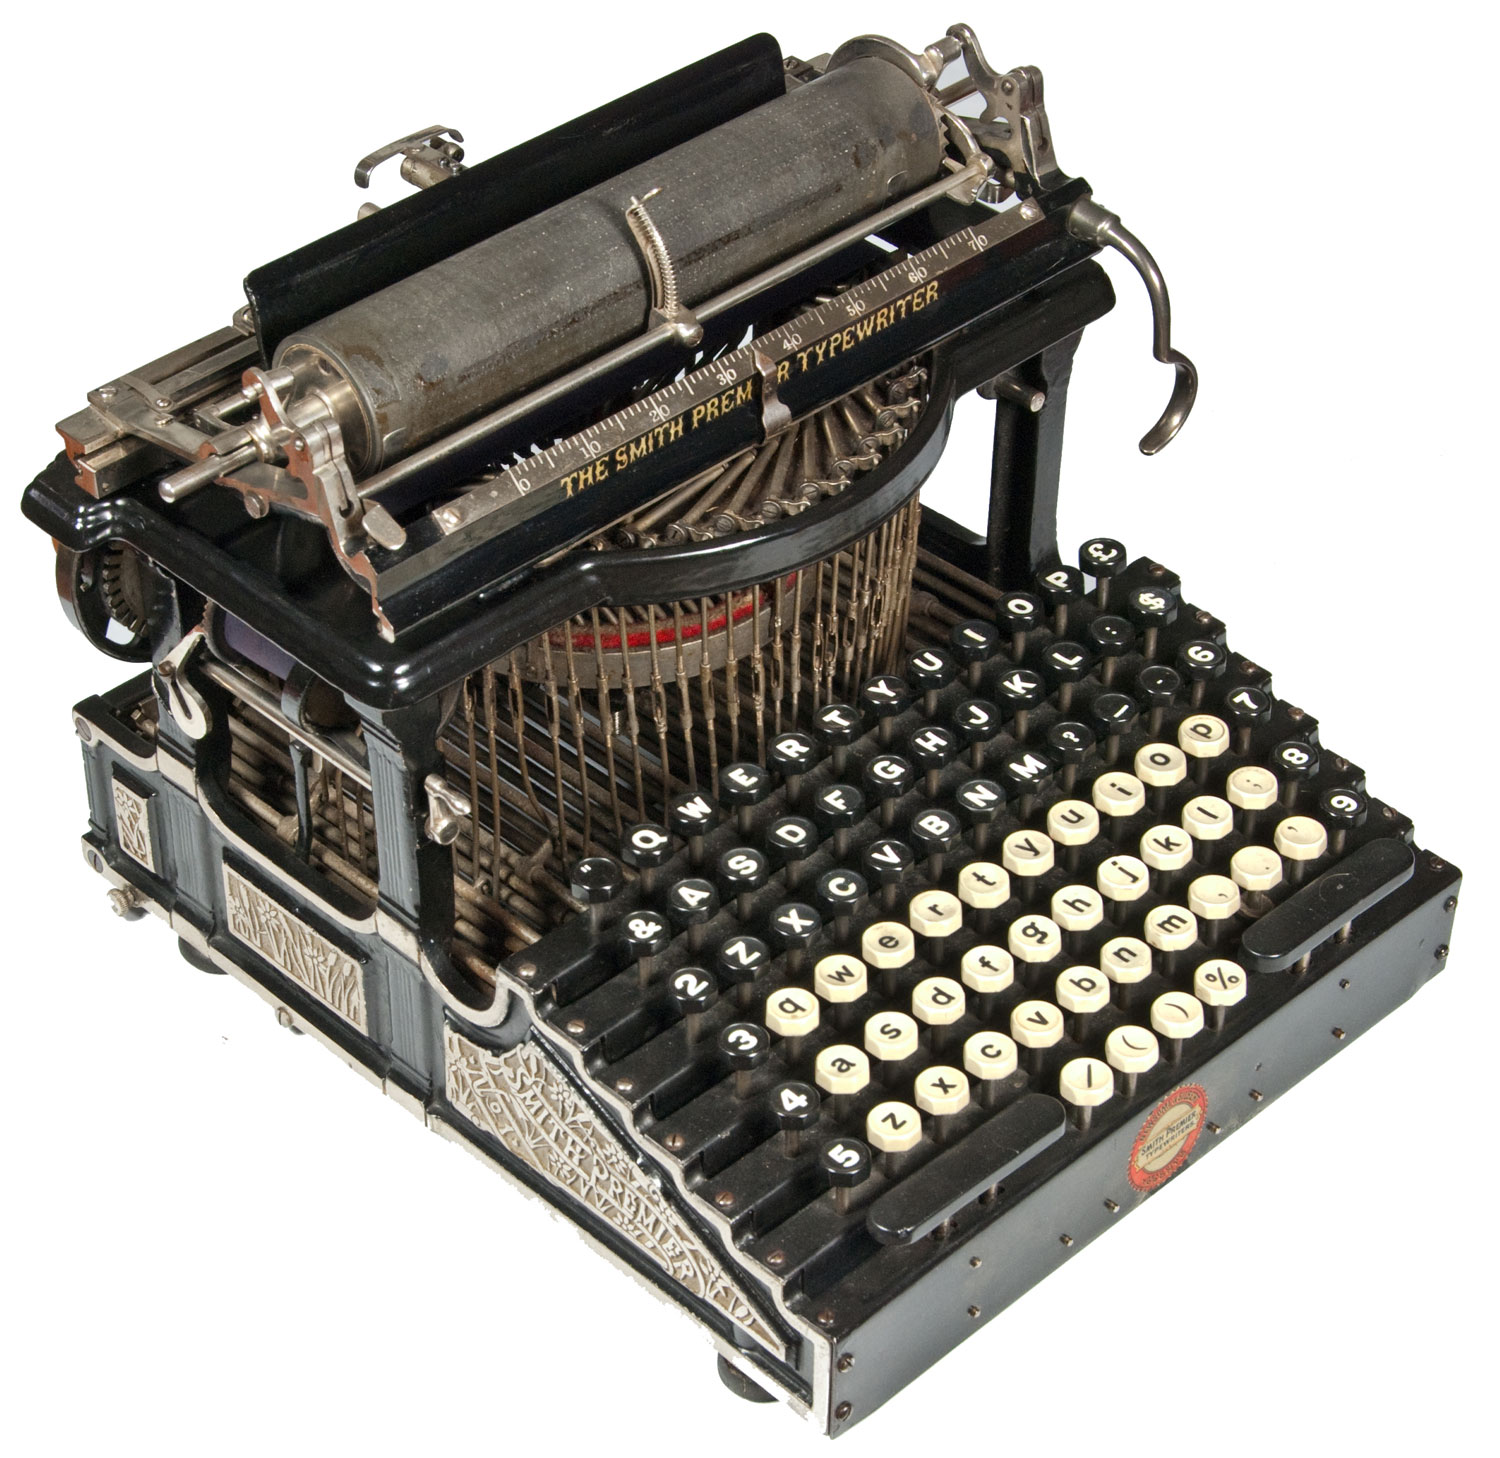
While not quite a 200% keyboard, the Smith Premier 1 definitely has one in spirit. As you can probably tell, there are separate keys for upper and lower case letters. No key performs a second function, so there is no Shift in sight. I particularly like the double space bars and the fact that the numerals run down both sides.
This machine, produced by the L.C. Smith Gun Co. of Syracuse, New York beginning in the late 1880s was “the most advertised and successful double keyboard typewriter of its time”. It sold for $100, which was about average for a keyboard typewriter at that time, when one could buy a horse-drawn carriage for $60.
While modern typewriters make use of keys attached to type bars with levers, the Smith Premier uses an array of turning rods in order to transfer motion from the key press to the type bar.
Pressing a key turns a particular horizontal rod that runs the length of the machine. At the rear, a small lever connected to the rod pulls down on the type bar above it, striking the paper. Apparently this design was quite smooth and responsive for the typist. Be sure to check out the detailed images on this one.
ICYMI: the Portable Pi 84
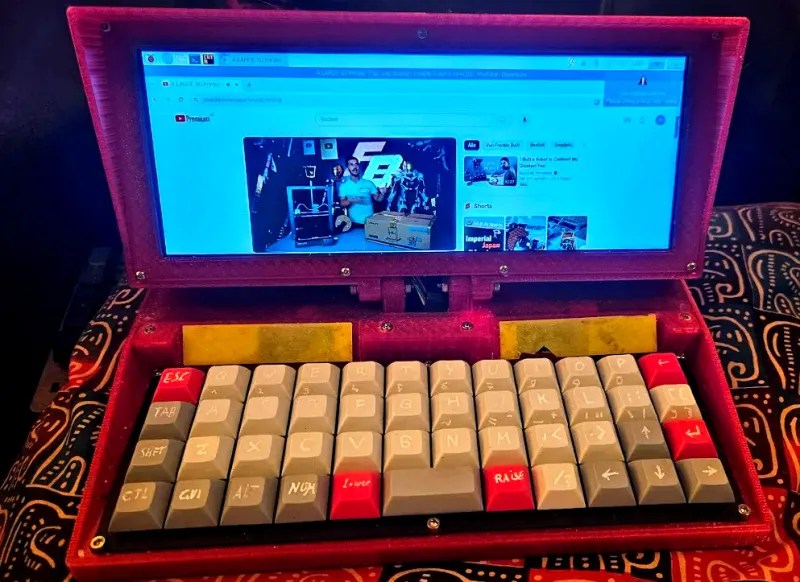
Over the years, the idea of ‘portable’ has changed significantly. While we once had luggable computers and chonky laptops, these have given way to sleek machines that look pretty much all alike from the outside.
Some of those laptops of yore had ultra-wide displays and were hinged in the center, leaving a sort of trunk the back. It is these classic computers that inspired [Michael Mayer] to build the Portable Pi 84.
Well, those, and in particular, [Michael]’s chosen mechanical keyboard, itself based on the Happy-Keyboard from [Luis Alegría]. The 9.3″ Waveshare display serendipitously just fits over the keyboard, and the rest is in that spacious trunk — the Raspberry Pi 4, a UPS hat, a couple of 21700 batteries, and a pair of speakers.
Be sure to check out the printed panels that let the user change up the ports and connection layout, because that’s an incredibly cool idea.
Got a hot tip that has like, anything to do with keyboards? Help me out by sending in a link or two. Don’t want all the Hackaday scribes to see it? Feel free to email me directly.