
![i2c-for-hackers:-digging-deeper-[hackaday]](https://i0.wp.com/upmytech.com/wp-content/uploads/2024/09/210503-i2c-for-hackers-digging-deeper-hackaday.png?resize=800%2C227&ssl=1)
I2C For Hackers: Digging Deeper [Hackaday]
Last time, I gave you an overview of what you get from I2C, basics like addressing, interface speeds, and a breakdown of pullups. Today, let’s continue looking into I2C capabilities and requirements – level shifting, transfer types, and quirks like combined transfers or clock stretching.
Level Shifting
Today, the overwhelming majority of I2C devices are 3.3 V logic. but this wasn’t always the case. If you work with old tech or with I2C on VGA/DVI/HDMI ports, you will see 5 V I2C networks, and if you work with very new tech, you will see 1.8 V I2C networks; rarely, you might even see 2.5 V networks!
Interfacing 5 V devices with a 3. 3V controller, it might not be necessary to level shift. You need to a) wire pullups to 3.3 V, and b) win the device input tolerance lottery. Same goes interfacing 3.3 V devices with 1.8 V hosts – wire up pullups to 1.8 V and pray to the stars. It can work in production – here’s Adafruit taking the 3.3 V-pulled-up Raspberry Pi I2C bus, and connecting it to a 5 V-powered MCP23017 chip that drives a 5 V-connected HD44780 display.
If your arrangement is different, or you’re experiencing a problem, you will want a level shifter circuit. At their simplest, two N-FETs like 2N7002 will do wonders. If you want smaller PCB footprint, better parameters, or more channels, there are level shifter chips, with many of them wonderfully suited for I2C (read the datasheet!). As we’ve featured before, some shifter ICs are too smart for their own good, while others will do just fine – if in doubt, remember to use your logic analyzer judiciously.
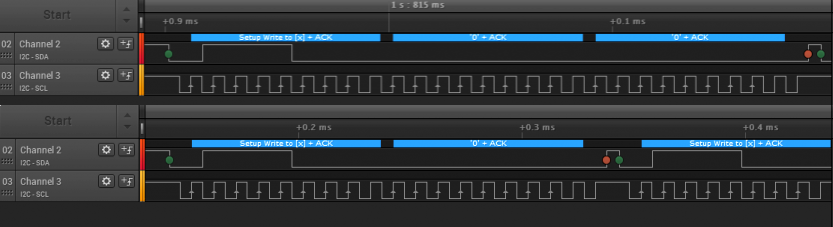
Two Ways To Talk
There are two kinds of I2C transfers you could expect to perform – I’d call them “simple transfers” and “register transfers”. With simple transfers, you send an address, and after the device ACKs, you either send or receive a single byte – it’s just like working with a shift register. With register transfers, you send an address, then a register number, and the device sends you the “contents” of that register – it’s more like working with an SPI display.
The PCF8574 is an I2C GPIO expander that does simple transfers. It has eight GPIO pins, and it only does simple transfers. How does that work, given it does both input and output? Well, the PCF8574 has only three possible states for all pin, with two of them combined together. The “Low” state (writing 0) is a hard pull down to GND. The “High” state (writing 1) is a weak pull to VCC – which also makes the pin work as an input with a pullup enabled. To check the input state, just read the expander state, and see if any of the pins you’ve set to 1 are now reading as 0. You can’t do a lot of high-side driving, sure, but you can still drive LEDs and check buttons, plus, this scheme is dead simple and covers a ton of use cases.
A good few I2C devices use simple transfers – the LM75 temperature sensor, for instance, only has to return temperature. You can read out multiple bytes at once, of course – simple transfers aren’t inherently limited to a single byte! PCF8575, the 16-bit sister of the PCF8574, has 16 GPIOs, I’ve used simple transfers with an ATMega328P keypard controller I created at some point – it would return keycodes, taken from a ring buffer. However, at some point, I decided to add more features to it, like ADC reading to help out a Pi Zero it was connected to, and had to upgrade it to register transfers.
The MCP23017 is a GPIO expander that uses register transfers. It has 16 GPIO pins, and a ton of features, each with their own register. Since one register contains 8 bits and we have 16 GPIOs, there are two registers per feature, and as such, there are two registers for pin directions, two for enabling integrated pullups, two for reading out input states, two for setting pins as outputs, and so on. They can even be arranged in two different ways, one backwards compatible with a different chip, by changing a bit in the status register! It’s a fair bit more complex chip than the PCF8574, but the complexity pays off where you need it.
I2C EEPROMs work with register transfers, too – some use 8-bit addresses, which allows for up to 256 bytes of storage. Higher-capacity EEPROMs use 16-bit (two-byte) addresses, where you’re expected to send in two bytes before you can read data out; if you try to read from such an EEPROM using two-byte addresses, you will just read back zeroes, so beware!
Quirks
But what if the device can’t keep up with the multi-byte transactions that your microcontroller is asking for? Maybe you have an EEPROM that needs time before it can read out a value from its internal memory so that it your MCU can receive it, maybe it’s a sensor that needs to average some values quickly and it just can’t catch up with even the lax timing requirements of 100 kHz I2C.
There’s a solution – it’s called clock stretching, and it’s basically an I2C device holding SCL low after receiving a byte, extending ACK state for a long time, until it can actually return meaningful data. As long as SCL is low, the controller should wait for the device. It’s essentially a way for a device to say “wait, not yet, I need some time before I can give you what you’re looking for”.
Raspberry Pi didn’t support clock stretching for the longest time due to a silicon bug. Every single Pi version before Pi 4 couldn’t handle clock stretching, including all of the Pi Zero versions released at the time of writing this article. The workaround, if you need one – use software I2C. It consumes more CPU since you have to use a kernel driver that bitbangs the bus, but it does have functional clock stretching. And of course the Raspberry Pi isn’t alone: if you are likely to need clock stretching, make sure that the microcontroller hardware peripheral supports it properly.
Next time, we dive into the physical layer, look at logic analyzer traces, understand how communication happens, and the ways it can break despite our best intentions.
