
![hacker-tactic:-pimp-your-probes-[hackaday]](https://i0.wp.com/upmytech.com/wp-content/uploads/2024/08/204456-hacker-tactic-pimp-your-probes-hackaday-scaled.jpg?resize=800%2C445&ssl=1)
Hacker Tactic: Pimp Your Probes [Hackaday]

Is your multimeter one of your trusty friends when building up boards, repairing broken gadgets, and reverse-engineering proprietary ones? Is it accompanied by a logic analyzer or an oscilloscope at times?
Having a proper probing setup is crucial for many a task, and the standard multimeter probes just won’t do. As a PCB is slipping under your grip as you’re trying to hold the standard multimeter probes on two points at once, inevitably you will ponder whether you could be doing things differently. Here’s an assortment of probing advice I have accumulated.
Beyond The Norm
There’s the standard advice – keep your board attached firmly to a desk, we’ve seen gadgets like the Stickvise help us in this regard, and a regular lightweight benchtop vise does wonders. Same goes for using fancy needle probes that use gravity to press against testpoints – they might be expensive, but they are seriously cool, within limits, and you can even 3D-print them!
Both of these become insufficient at some point, sadly – sometimes you need to change the probing spots so often that the gravity probes become bothersome, sometimes the board is double-sided and you need to flip it for tracing a connection, and sometimes you want to do current injection where the probing point actually matters. Default multimeter probes are nice, but they are also dull to the point it’s easy to short adjacent IC pads if you’re not careful.
So, where do you go? My advice is, fashioning your own probes or buying nonstandard ones. Ever find a set of broken multimeter probes? Good, you can use them up as banana jack pigtails, a piece of solderable wire with a banana jack on one end. Don’t got some broken probes? Just buy a cheap set and harvest wires from it, or build some out of screwpost banana jacks. You can fashion a fair few things with solderable banana leads – let’s take a look!
Just Solder It On
The first advice I have is literally soldering such pigtails to a GND pad on your board. This is wonderful if you have to constantly probe voltages relative to GND, soldering a wire to GND is a serious timesaver – it frees up one of your hands, and unlike crocodile clip probes, it is not terribly likely to break off silently while you’re in the middle of debugging. If you must probe between two non-soldered-to points, feel free to temporarily swap in a usual probe – that’s why I recommend a spare probe wire for this!
If GND is your reference and you’re tempted to use something that looks like it should be GND, make sure your probe soldering point is GND-connected! USB-C sockets are a good starting point for this – all USB-C sockets must have their shield grounded, no matter the device. Of course, before assuming that a certain connector shield is ground, you must check that it actually connects to the board’s ground, which should be easy to find on your board’s inevitably present decoupling capacitors.

Soldering won’t work for smaller testpoints, unless you use a piece of magnet wire for the last-inch part and hotglue or tape the probe wire to the board. If you don’t do one of these, the wire will either break away from the board easily, or even tear your testpoint off the board completely; many times I have foolishly tried to directly solder thick wires to small pads, and it invariably resulted in torn off pads, so I recommend you skip this step. For logic analysis, soldering 2.54 mm header wires in the same fashion is pretty convenient – I often use stray female-male wires from my bench for this.
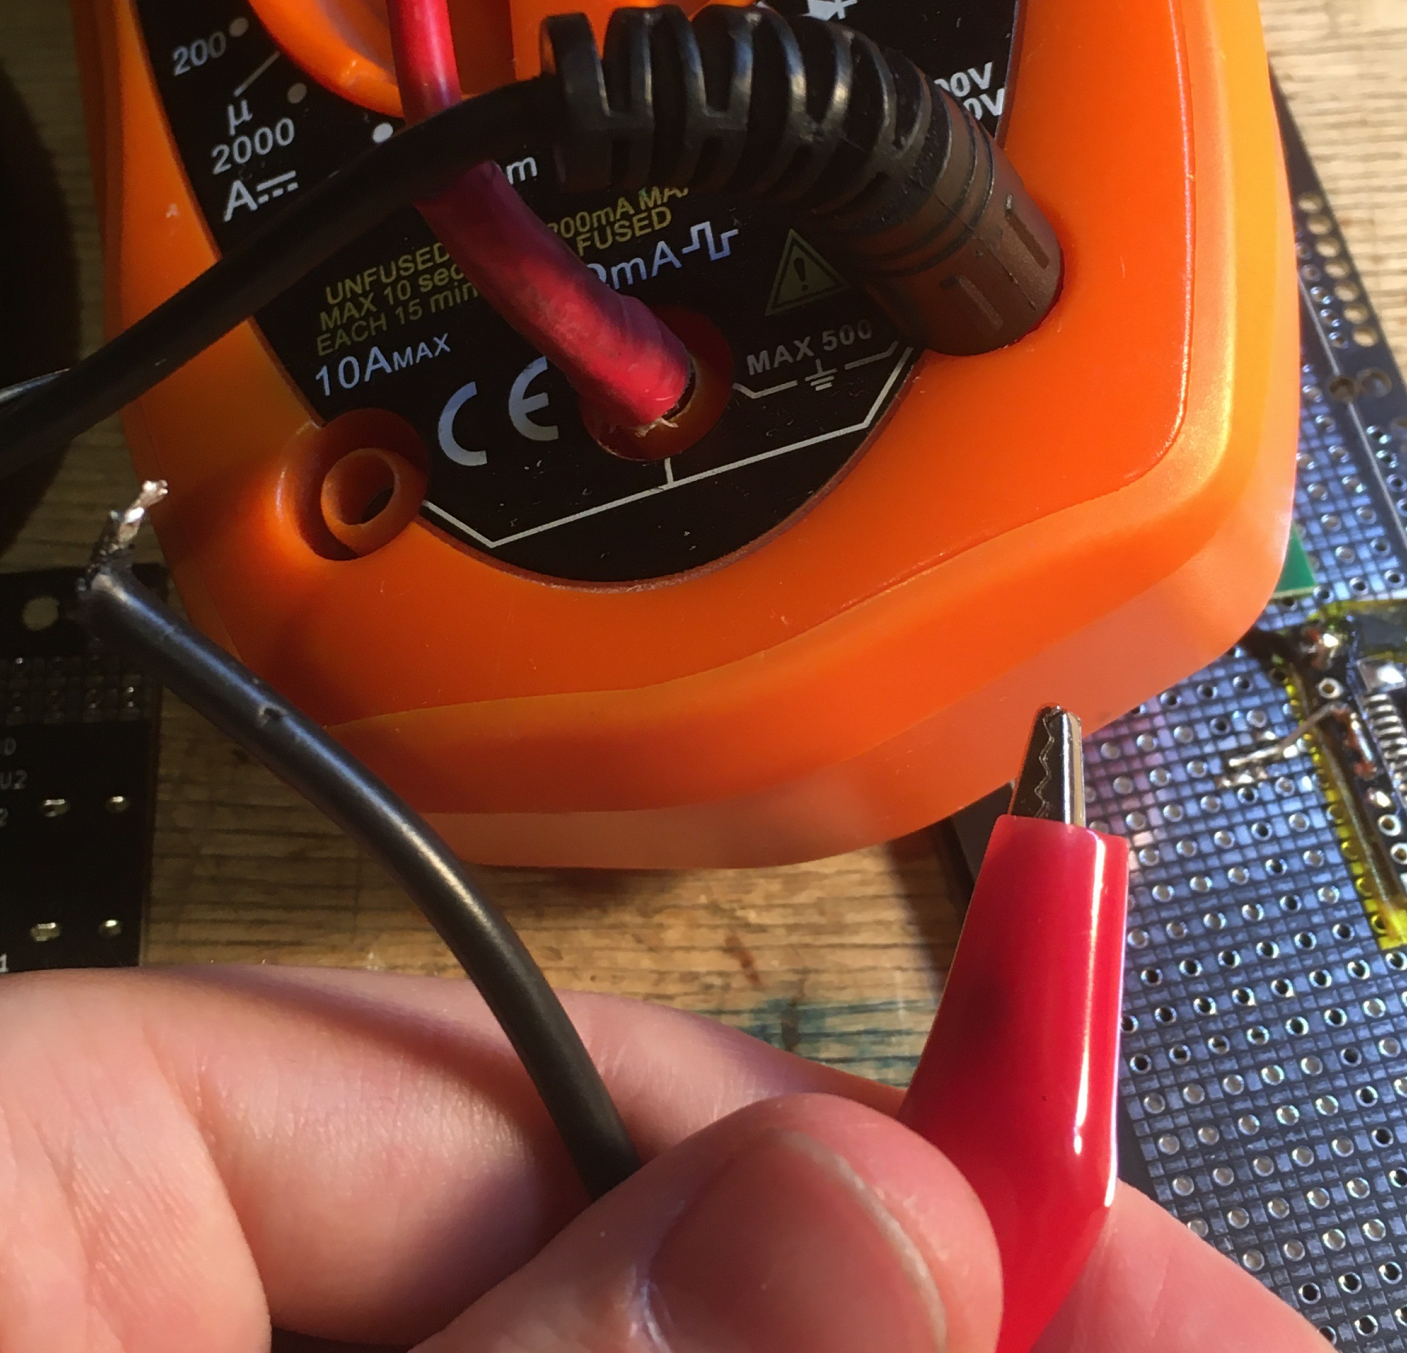
Of course, if you have a multimeter lead with a solderable end, you can easily convert it to a croc clip end – those are also quite handy for times when you don’t want to bother soldering or can’t do it! You can buy a set of decent croc clip probes, but if you haven’t yet, a broken probe and a croc clip end will do just fine. Apart from the usual things you would use a crocodile clip for, there’s one more purpose you might not have considered!
Reusing Metal Brushes And Tweezers
I’ve done a fair bit of reverse-engineering where my task was to figure out all connections to a certain pad, usually on multi-layer boards with no visible tracks in sight. In laptop repair, you would usually use a boardview for this, but they’re rarely available for generic devices, and while that Nintendo Switch flying wire reverse-engineered boardview is impressive, it’s not about to become a hacker household staple, unless everyone levels up their skills real quick.
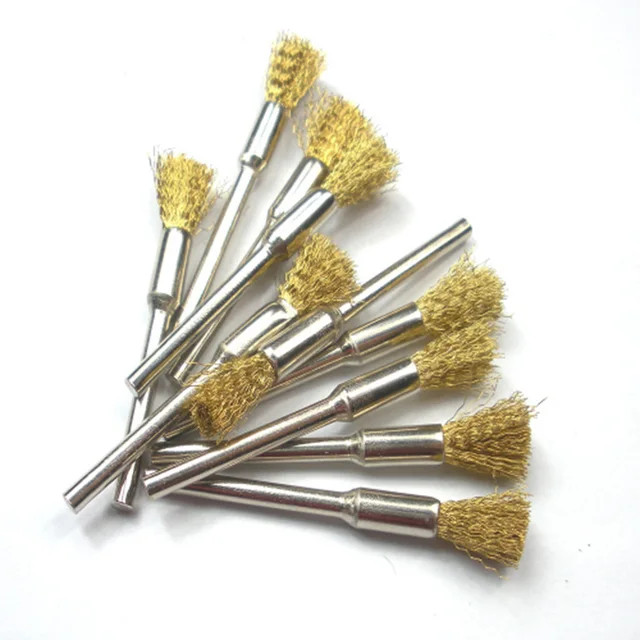
Enter metal brushes – of the kind you find in dremel and other rotary tool kits. Where does a certain pin of an IC lead? One probe wire held onto the pin, another probe is a croc clip holding the metal brush that you gently caress your board with; not too strongly so as to scratch the soldermask, but strongly enough to break through the oxides on the solder joints. I keep two sizes – one large and one small, using the large one first to find the general contact areas, and then using the small brush to narrow it down.
These are instrumental for many a black box board, and so are metal SMD tweezers – as long as they’re sharp to a point, you can use them as super sharp multimeter probes. Spread the tweezer legs, insert your wire up to the very top of the join point, then release the tweezers, and make sure it doesn’t fail a continuity test. Congrats, you have just acquired a probe sharp enough to probe 0.5 mm pitch pins with ease. As long as your parallax vision doesn’t fail you, you will do just fine, which is to say, it will be less of a struggle than usual. I use Rhino tweezers that you can get on Adafruit, Dangerous Prototypes, or Aliexpress – they are super sharp and durable in long term.
Much More Cool Stuff To Learn
Summary – have some solderable banana jack pigtails handy, which you can make out of old or cheap probes. You can use them to free up a hand while probing or do current injection. In a pinch, you can use metal brushes held in croc probes for reverse-engineering, and tweezers holding solderable leads for fine point probing. With these tricks, you will find that many kinds of probing and repair work gets easier and way less failure-prone.
Now, these aren’t the only probe hacks; for instance, when using an oscilloscope and measuring high-speed signals or power rails, upgrading your ground connection can give you a significantly cleaner signal. Also, don’t be afraid of making custom jigs for testing your boards, and don’t forget about probing for ESD diodes!