
![embedded-python:-micropython-is-amazing-[hackaday]](https://i0.wp.com/upmytech.com/wp-content/uploads/2024/07/194596-embedded-python-micropython-is-amazing-hackaday-scaled.jpg?resize=800%2C445&ssl=1)
Embedded Python: MicroPython Is Amazing [Hackaday]

In case you haven’t heard, about a month ago MicroPython has celebrated its 11th birthday. I was lucky that I was able to start hacking with it soon after pyboards have shipped – the first tech talk I remember giving was about MicroPython, and that talk was how I got into the hackerspace I subsequently spent years in. Since then, MicroPython been a staple in my projects, workshops, and hacking forays.
If you’re friends with Python or you’re willing to learn, you might just enjoy it a lot too. What’s more, MicroPython is an invaluable addition to a hacker’s toolkit, and I’d like to show you why.
Hacking At Keypress Speed
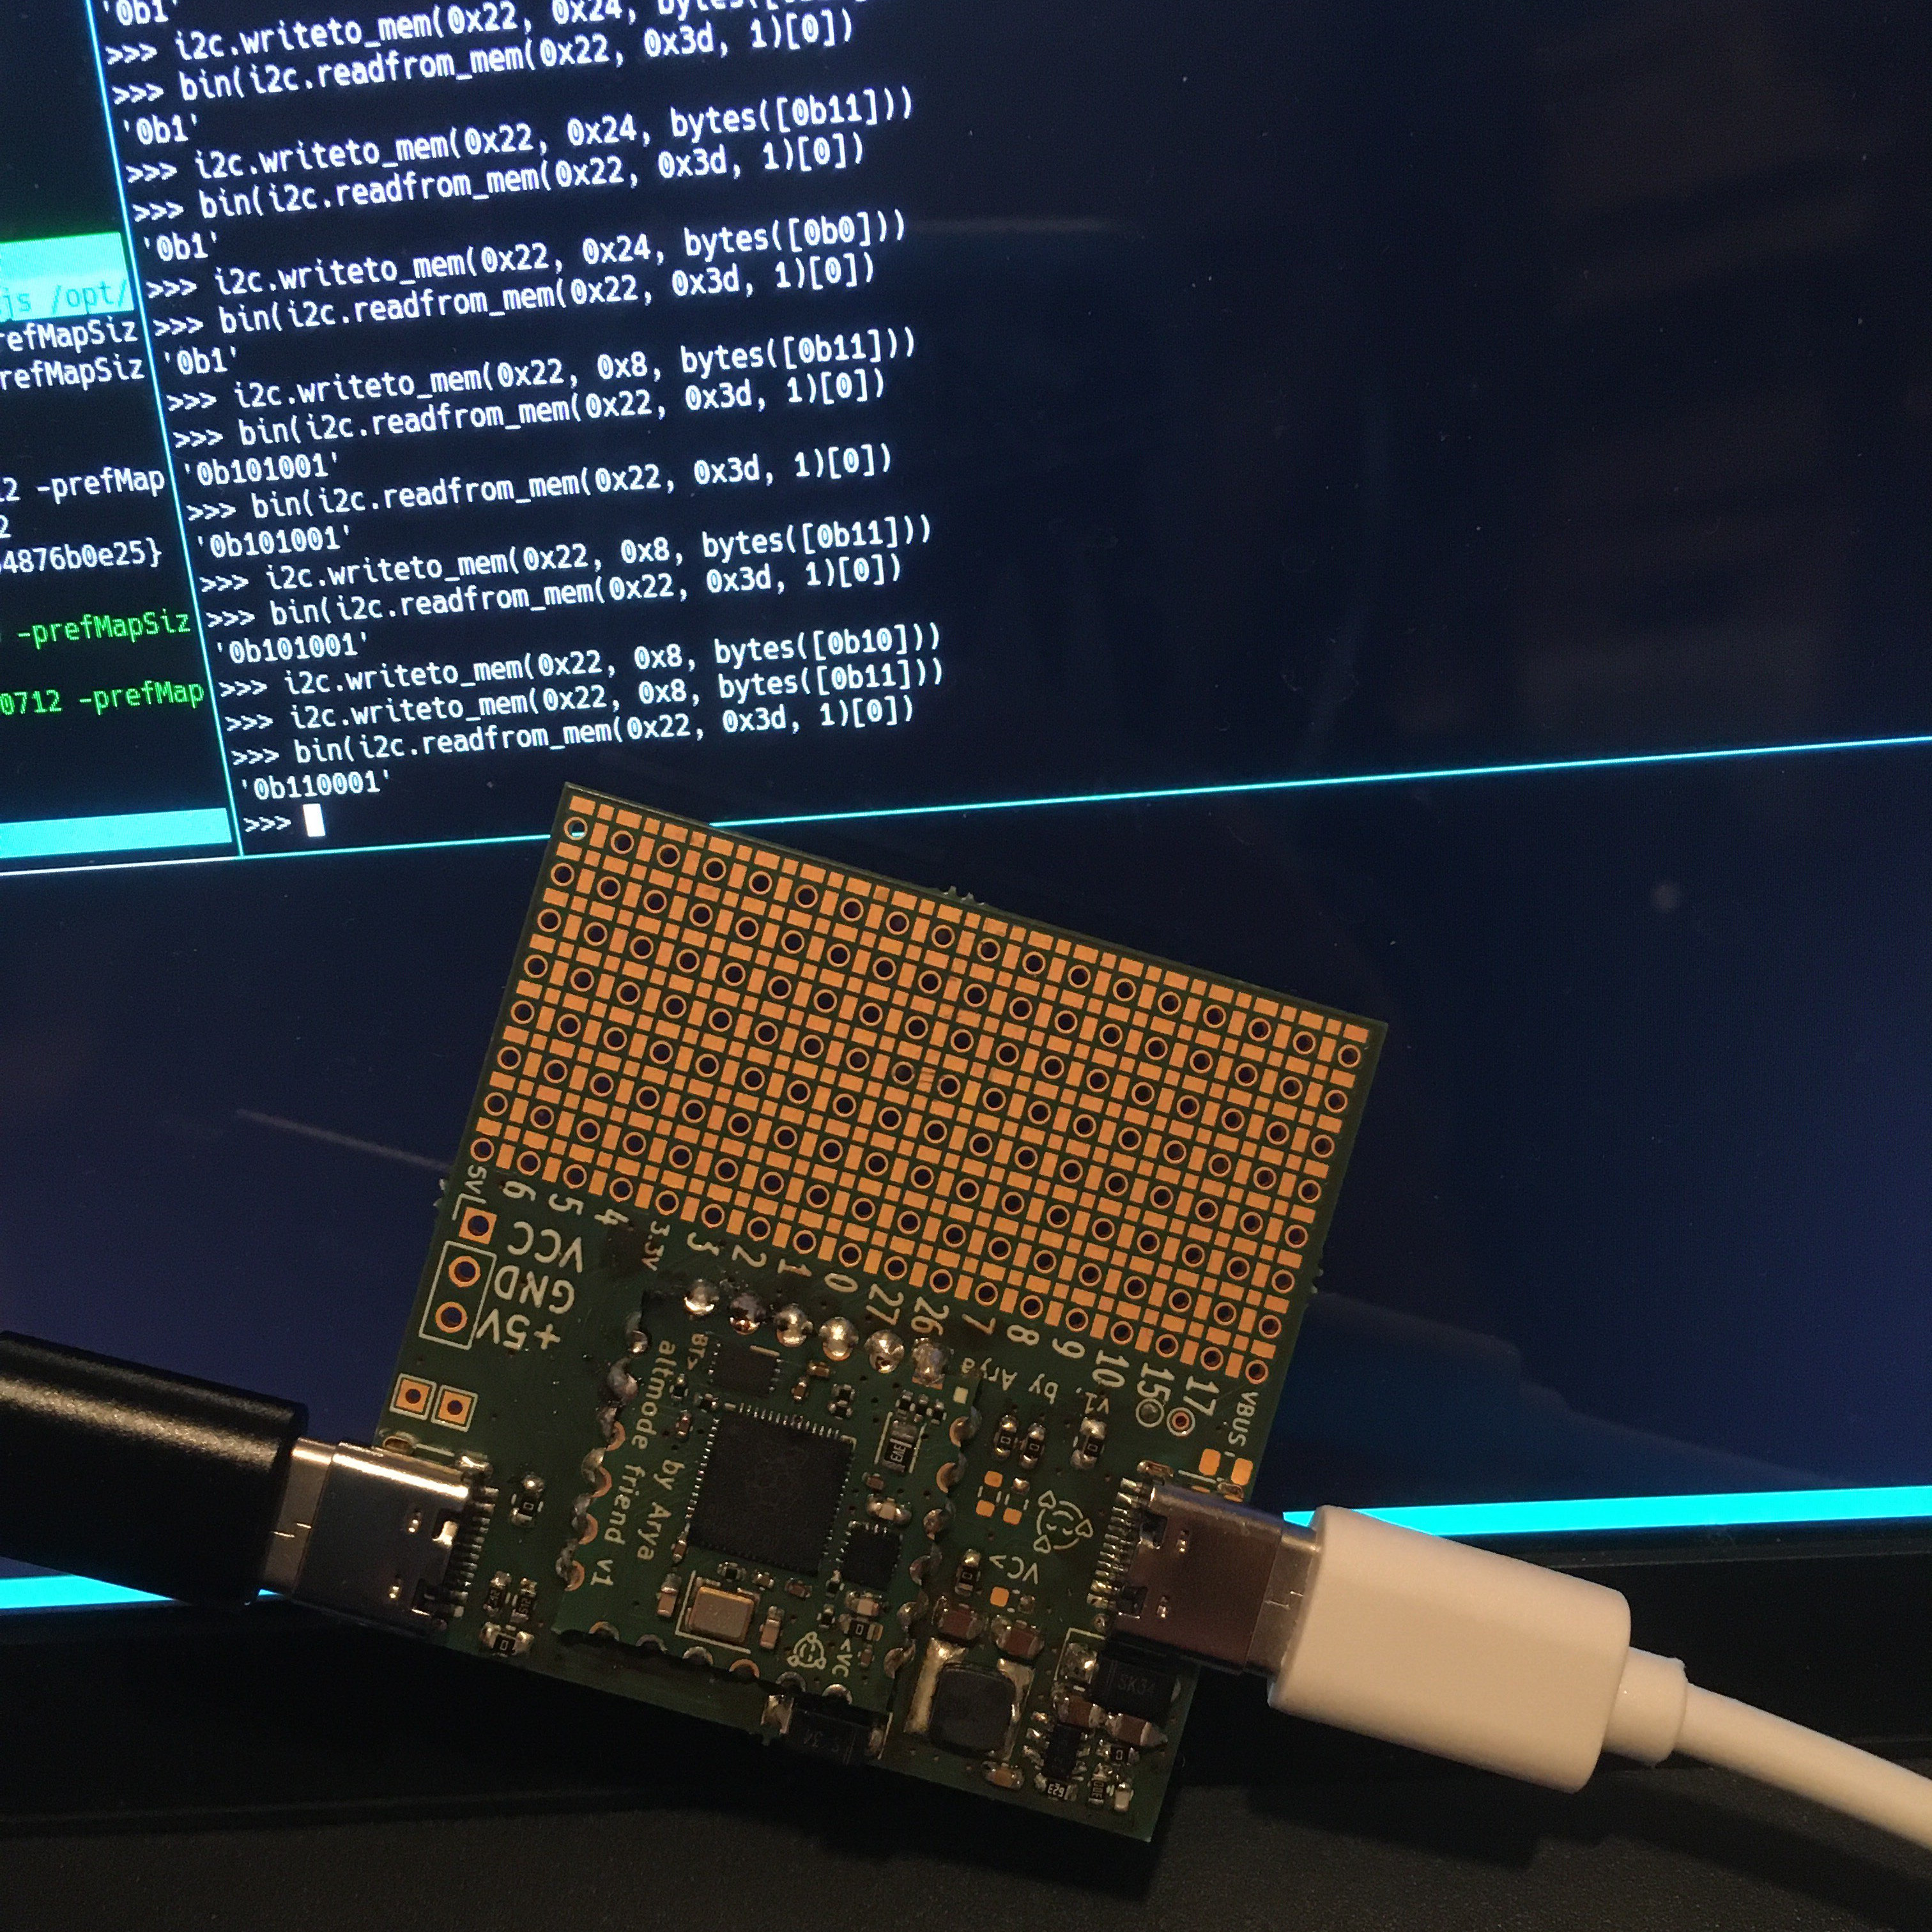
Got a MicroPython-capable chip? Chances are, MicroPython will serve you well in a number of ways that you wouldn’t expect. Here’s a shining example of what you can do. Flash MicroPython onto your board – I’ll use a RP2040 board like a Pi Pico. For a Pico, connect an I2C device to your board with SDA on pin 0 and SCL on pin 1, open a serial terminal of your choice and type this in:
>>> from machine import I2C, Pin
>>> i2c = I2C(0, sda=Pin(0), scl=Pin(1))
>>> i2c.scan()
This interactivity is known as REPL – Read, Evaluate, Print, Loop. The REPL alone makes MicroPython amazing for board bringup, building devices quickly, reverse-engineering, debugging device library problems and code, prototyping code snippets, writing test code and a good few other things. You can explore your MCU and its peripherals at lightning speed, from inside the MCU.
When I get a new I2C device to play with, the first thing I tend to do is wiring it up to a MicroPython-powered board, and poking at its registers. It’s as simple as this:
>>> for i in range(16):
>>>     # read out registers 0-15
>>>     # print "address value" for each
>>>     print(hex(i), i2c.readfrom_mem(0x22, i))
>>> # write something to a second (0x01) register
>>> i2c.writeto_mem(0x22, 0x01, bytes([0x01]) )
That i2c.scan() line alone replaces an I2C scanner program you’d otherwise have to upload into your MCU of choice, and you can run it within three to five seconds. Got Micropython running? Use serial terminal, Ctrl+C, and that will drop you into a REPL, just type i2c.scan() and press Enter. What’s more, you can inspect your code’s variables from the REPL, and if you structure your code well, even restart your code from where it left off! This is simply amazing for debugging code crashes, rare problems, and bugs like “it stops running after 20 days of uptime”. In many important ways, this removes the need for a debugger – you can now use your MCU to debug your code from the inside.
Oh, again, that i2c.scan()? You can quickly modify it if you need to add features on the fly. Want addresses printed in hex? (hex(addr) for addr in i2c.scan()). Want to scan your bus while you’re poking your cabling looking for a faulty wire? Put the scan into a while True: and Ctrl+C when you’re done. When using a typical compiled language, this sort of tinkering requires an edit-compile-flash-connect-repeat cycle, taking about a dozen seconds each time you make a tiny change. MicroPython lets you hack at the speed of your keyboard typing. Confused the pins? Press the up button, edit the line and run the i2c = line anew.
To be clear, all of code is running on your microcontroller, you just type it into your chip’s RAM and it is executed by your MCU. Here’s how you check GPIOs on your Pi Pico, in case you’re worried that some of them have burnt out:
>>> from machine import Pin
>>> from time import sleep
>>> pin_nums = range(30) # 0 to 29
>>> # all pins by default - remove the ones connected to something else if needed
>>> pins = [Pin(num, Pin.OUT) for num in pin_nums]
>>>
>>> while True:
>>>   # turn all pins on
>>>   for i in range(len(pins)):
>>>     pins[i].value(True)
>>>   sleep(1)
>>>   # turn all pins off
>>>   for i in range(len(pins)):
>>>     pins[i].value(False)
>>>   sleep(1)
>>>   # probe each pin with your multimeter and check that each pin changes its state
There’s many things that make MicroPython a killer interpreter for your MCU. It’s not just the hardware abstraction layer (HAL), but it’s also the HAL because moving your code from board to board is generally as simple as changing pin definitions. But it’s all the other libraries that you get for free that make Python awesome on a microcontroller.
Batteries Included
It really is about the batteries – all the libraries that the stock interpreter brings you, and many more that you can download. Only an import away are time, socket, json, requests, select, re and many more, and overwhelmingly, they work the same as CPython. You can do the same r = requests.get("https://retro.hackaday.com"); print(r.text)[:1024] as you would do on desktop Python, as long as you got a network connection going on. There will be a few changes – for instance, time.time() is an integer, not a float, so if you need to keep track of time very granularly, there are different functions you can use.
Say, you want to parse JSON from a web endpoint. If you’re doing that in an Arduino environment, chances are, you will be limited in what you can do, and you will get triangle bracket errors if you mis-use the JSON library constructs because somehow the library uses templates; runtime error messages are up to you to implement. If you parse JSON on MicroPython and you expect a dict but get a list in runtime, it prints a readable error message. If you run out of memory, you get a very readable MemoryError printed out, you can expect it and protect yourself from it, even fix things from REPL and re-run the code if needed.
The user-supplied code is pretty good, too. If you want PIO or USB-HID on the RP2040, or ESP-CPU-specific functions on the ESP family, they are exposed in handy libraries. If you want a library to drive a display, it likely already has been implemented by someone and put on GitHub. And, if that doesn’t exist, you port one from Arduino and publish it; chances are, it will be shorter and easier to read. Of course, MicroPython has problems. In fact, I’ve encountered a good few problems myself, and I would be amiss not mentioning them.
Mind The Scope
In my experience, the single biggest problem with MicroPython is that writing out MicroPython requires more of my attention span than I can afford. I personally shorten it to uPy or just upy, informally. Another problem is that the new, modernized MicroPython logo has no sources or high-res images available, so I can’t print my own stickers of it, and MicroPython didn’t visit FOSDEM this year, so I couldn’t replenish my sticker stock.
On a more serious note, MicroPython as a language has a wide scope of where you can use it; sometimes, it won’t work for you. An ATMega328P can’t handle it – but an ESP8266 or ESP32 will easily, without a worry in the world, and you get WiFi for free. If you want to exactly control what your hardware does, counting clock cycles or hitting performance issues, MicroPython might not work for you – unless you write some Viper code.
If you want to have an extremely-low-power MCU that runs off something like energy harvesting, MicroPython might not work – probably. If you need your code run instantly once your MCU gets power, mind the interpreter takes a small bit of time to initialize – about one second, in my experience. If you want to do HDMI output on a RP2040, perhaps stick to C – though you can still do PIO code, there are some nice libraries for it.
Some amount of clock cycles will be spent on niceties that Python brings. Need more performance? There are things you can do. For instance, if you have a color display connected over SPI and you want to reduce frame rendering time, you might want to drop down to C, but you don’t have to ditch MicroPython – just put more of your intensive code into C-written device drivers or modules you compile, and, prototype it in MicroPython before you write it.
As Seen On Hackaday
There’s something immensely satisfying about poking at a piece of technology interactively and trying to squeeze features out of it, much more if it ends up working, which it didn’t, but it did many other times! I’ve been hacking on that PD stack, and now I’m slowly reformatting it from a bundle of functions into object-based code – Python makes that a breeze.
Remember the Sony Vaio board? Its EC (embedded controller) is a RP2040, always powered on as long as batteries are inserted, and it’s going to be running MicroPython. The EC tasks include power management, being a HID over I2C peripheral, button and LED control, and possibly forwarding keyboard and trackpoint events to save a USB port from the second RP2040, which will run QMK and server as a keyboard controller. MicroPython allows me to make the firmware quickly, adorn it with a dozen features while I do it, and keep the codebase expandable on a whim. The firmware implementation will be a fun journey, and I hope I can tell about it at some point.
Have you used MicroPython in your projects? What did it bring to your party?