
![audio-on-pi:-here-are-your-options-[hackaday]](https://i0.wp.com/upmytech.com/wp-content/uploads/2024/08/203760-audio-on-pi-here-are-your-options-hackaday.png?resize=800%2C445&ssl=1)
Audio On Pi: Here Are Your Options [Hackaday]
There are a ton of fun Raspberry Pi and Linux projects that require audio output – music players, talking robots, game consoles and arcades, intelligent assistants, mesh network walkie-talkies, and much more! There’s no shortage of Pi-based iPods out there, and my humble opinion is that we still could use more of them.
To help you in figuring out your projects, let’s talk about all the ways you can use to get audio out of a Pi or a similar SBC. Not all of them are immediately obvious and you ought to know the ropes before you implement one of them and get unpleasantly surprised by a problem you didn’t foresee. I can count at least five ways, and they don’t even include a GPIO-connected buzzer!
Let’s rank the different audio output methods, zoning in on things like their power consumption, and sort them by ease of implementation, and we’ll talk a bit about audio input options while we’re at it.
USB: Accessible, Cheap, Growing
In the first category of audio interfaces, you have USB, Bluetooth, HDMI and network audio. All of these are high-power-consumption interfaces, with HDMI likely taking the inefficiency cake. Let’s talk about USB and BT first, since they are the interfaces you can use most realistically.
USB soundcards are definitely the simplest possible solution. You can get a very cheap one for $2 in the usual places, and while it might be noisy and cheaply built, you’re going to be fine with it for many usecases. It will likely have a 3.5 mm mic input, but you won’t always be able to use it as line-in.

Unironically, it’s perhaps the only Apple product with a reasonable price and a large featureset fully compatible with open-source OSes. There’s no shortage of other similar adapters, but I haven’t tested them as thoroughly as this one. If you get one with your phone, they should work just as well. Mind you – all of these will occupy a USB port and require a 5 V source, which makes them a bit of a power hog. Moreover, they’re wired, which is not always what you want.
Bluetooth: Tends To Work Well
What about Bluetooth? It is pretty great in situations where USB isn’t. The main advantage is of course wireless connectivity, and there’s lots of Bluetooth to go around. You can get speakers, headphones of all sorts, and 3.5 mm audio adapters. It’s a pretty good solution if you don’t want any tether between you and your device, or if you just have a spare Bluetooth headset/speaker that you want to put to good use.
There are plenty of obvious advantages to Bluetooth, so I’d like to focus on disadvantages here, and tell you how to work around them. On the Pi, the Bluetooth connection basically occupies the only stable UART port you can get, so if you want to have a UART connection for your GSM modem, GPS, or Linux debug console purposes, you will want either a USB Bluetooth adapter, a USB-UART adapter, use one of those obscure SPI to UART chips. Oh, if you have a Pi 4 or Pi 5, remember, it has extra UART ports waiting for you, so you might not need to use any extra USB!
The input situation on Bluetooth is kind of sad, too, so beware if you expect a headset and a microphone to work at the same time. The gist is, due to limited bandwidth, there have traditionally been two Bluetooth audio modes available – a bidirectional one optimized for low bandwidth voicecalls (HFP and HSP modes), and a unidirectional one optimized for music (A2DP). The bidirectional modes simply have lower audio output quality. The aptX codec increases audio quality even in bidirectional audio modes, but it’s as proprietary as any Qualcomm product, and devices that use aptX are both expensive and kind of rare.
Another disadvantage of Bluetooth is its many failure points. Your Bluetooth audio device is a whole separate entity, usually its own battery that needs to be kept charged and might die at some point. If your hardware isn’t good, you might have to re-pair devices every now and then, the connection range is limited, it drops even further if a badly built microwave oven is operating nearby, Bluetooth software stacks are a mess more often than not, and Bluetooth adapters are typically pretty proprietary. All of this can result in mysterious problems you often can’t solve unless you fully swap your hardware. If it works, it works; if it doesn’t, you may be out of luck.
Network And HDMI Audio: Unexpected Options
There are disadvantages to roc, certainly – one of them is about a second’s worth of delay caused by the buffer, which does make for good audio over WiFi transmission and is negligible for music listening, but it’s not good for gaming, and it might screw with your brain if you’re watching a movie; I’ve gotten used to it over time though. Apart from this, the roc-recv CLI process doesn’t exit if you unplug a USB audio adapter it’s using, starting to consume 100% of CPU until it’s killed and not reattaching when the USB device is replugged, so if you want to use and your USB soundcard might get unplugged, you might have to power-cycle your device or trigger a service restart – I have USB device presence monitoring scripts that do it.
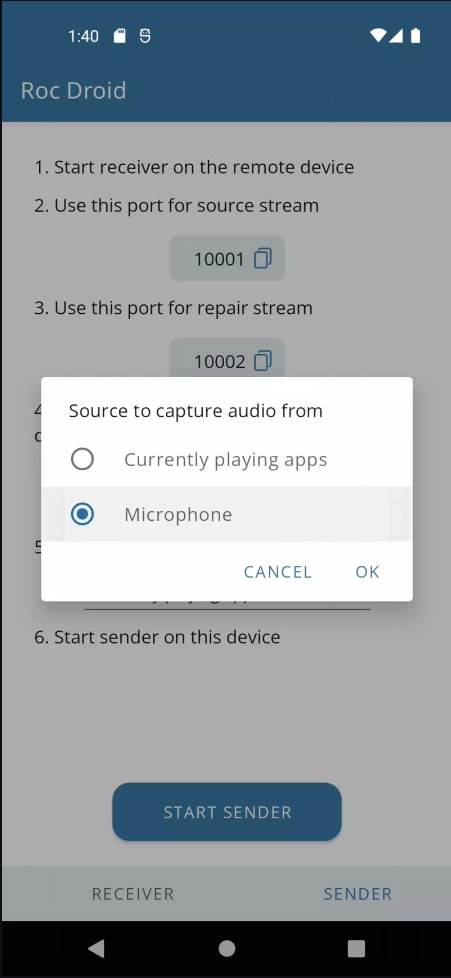
If you do not require a speaker, and you have a nearby smart device with a speaker/headset handy, roc might just become your new friend – it’s not uncommon to have an Android phone or a Linux/MacOS connected to the same network as your Pi, after all. The Android application is on F-Droid, even!
What if you are using a HDMI display with your Pi? You might be in luck and get a 3.5 mm jack for free, or, if you’re using a TV, you get access to its entire audio output system. Many Pi-suited cheap HDMI displays throw a 3.5 mm output in, like the one I converted into a USB touchscreen display a couple months ago. Not using a HDMI display? You can get a small HDMI audio extractor box. This is one way you can cheaply get a digital audio out of a Pi, since it seems that some of these boxes have a S/PDIF output. On the other hand, if you’re doing a low-power device and you’re not already using a HDMI interface, HDMI audio output on the Pi consumes a fair bit of extra power, and so will a HDMI-processing audio chip.
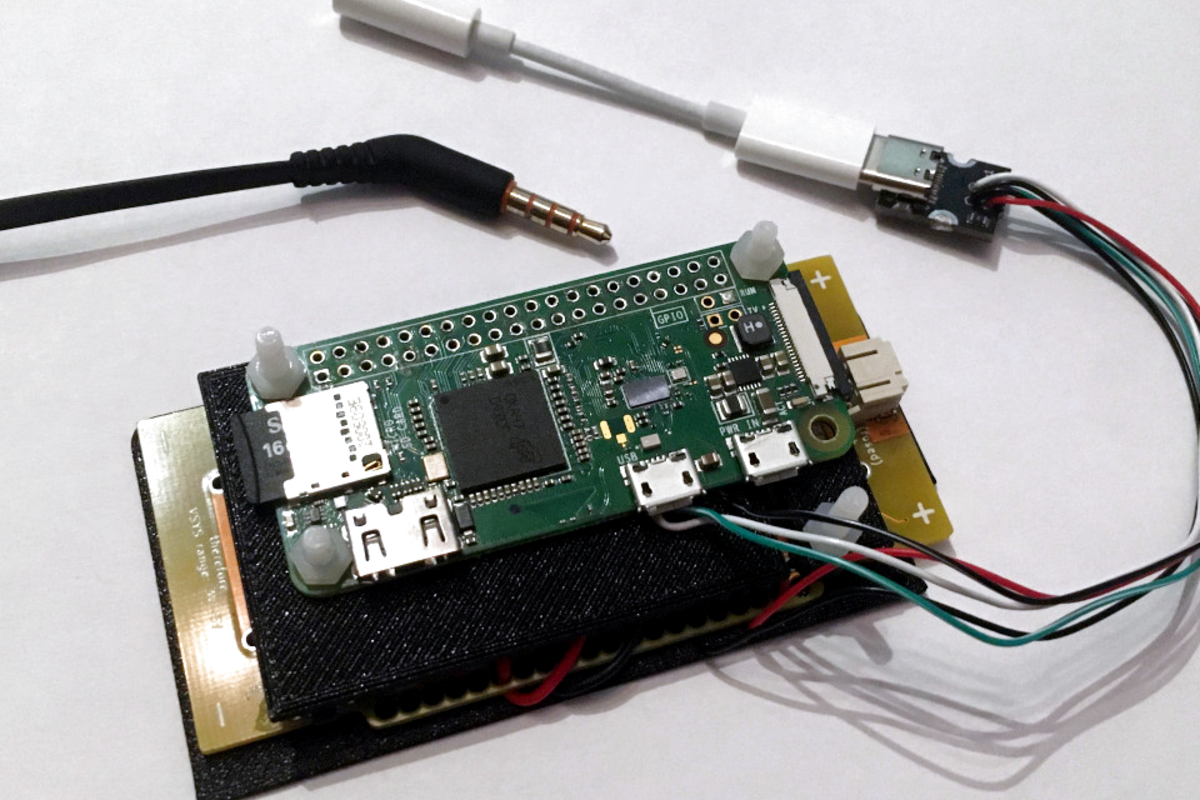
I2S And PWM: Low-Power, Featureful, Some Hacking Required
The last two interfaces are I2S and PWM – if you’re building a low-power or small integrated device, you should know about them, because they’re quite easy to use. A Broadcom-based Pi has two PWM channels, and this interface takes up both of them – one for left channel audio and another for right channel. It’s unpopulated on the Pi Zero models and on Pi 5, but on any other model, if you want to get some PWM for other purposes, whether that’s a fan or a servo motor, you will need to either use software PWM, steal one of the channels from the audio output, or disable the audio output altogether. Also, there’s only two sets of pins you can output PWM audio through, so, arrange your pins accordingly.
How does it work? Through the power of a custom kernel driver, adjusting the duty cycle and the frequency to match the audio your system wants to output, and it gets the job done pretty well. Want to learn more about how it works at the low level? Our own Jenny List has described it in a way better detail than I ever could. This interface has gone through two revisions between the Pi B and B+, though I can’t tell if the resistor/capacitor changes made were a quality improvement or just BOM optimization. It’s a decent interface, but you still might get some audible noise on it, especially at idle. The interface also doesn’t have much power due to inline resistors, so expect it to be too quiet if your headphones are high-impedance.
What if a single headphone jack isn’t enough? Want to do it the pro way, get audio from a dedicated chip, add a mic, and maybe drive a speaker while at it? I2S is the way to go, and it’s a seriously promising audio interface. It’s a three-data-wire interface (plus an extra wire if you also want audio input), it’s low-power, and integrating it into your board will give you a fair bit of hacker cred. One caveat – just like with PWM, you have to use it on a specific set of pins, so make sure you got them freed up!
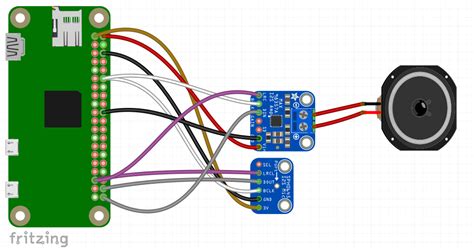
A codec is an entire audio system on a chip, usually used in phones and computers. Your phone’s CPU might only have a single I2S interface, yet it needs to drive headphones, a pair of speakers, grab data from onboard digital microphones and compensate for noise, your on-headset analog microphone, route all that audio to an LTE modem whenever needed, and maybe even apply some processing like wind cancellation. A CPU has neither the interfaces nor the CPU power to do all of this, which is why modern-day devices include a codec IC. Thanks to the market availability of these chips, there are a fair few Pi HATs carrying audio codec chips on their backs, and they bring you a whole bunch of audio capabilities at once.
If you want a featureful device when it comes to audio, get an I2S codec chip. If you can find a device schematic or a full datasheet that is using a certain codec, you’ve find a promising one, and all you have left is checking that your codec is supported by the Linux kernel; if not, you may make a bet on it nevertheless and hack it into submission. You will also need an I2C or SPI interface for configuration: the I2S interface is only usable for carrying audio data, it can’t carry sideband commands like “use a certain frequency for these digital microphones” or “adjust volume by X percent”. You’ll need some GPIO pins.
Your Turn
That’s as far as I’ve seen of Raspberry Pi and other Linux SBC audio, but if I have forgotten something, please do let me know! All in all, I hope this helps if you’re ever wondering just how much audio you can squeeze out of an ARM CPU, and you can go on to design that music player you always wanted to make!